Knowing how to take lifestyle product photos is essential for promoting your brand and selling your products. Gorgeous and aspirational imagery is becoming increasingly popular for its effectiveness, but how do you take lifestyle product photos that actually drive results for your business?
Your job is to create images that will stand out and remain in your customer’s mind long after they’ve seen them on your newly built brand website or social media channels.
To help you get started, this article will cover:
- Things to consider before shooting your product
- Where to shoot the product
- The best lighting for the product
- The most flattering angles for product pictures
- How to edit lifestyle product photos
Get all the tools you need to quickly find new customers and grow your retail store’s sales.
Things to consider before shooting your product
To help guide your artistic choices as a photographer, it is important to consider why you’re shooting your product in the first place. Some factors you should think about when planning your photo shoot include:
- What is this product for? This may seem simple, but the purpose of your product should inform everything, from location to casting to color choices.
- Where will it be featured? If you’re shooting for your brand website or email campaign, your choices might be different than a shoot intended for engaging social media followers. Think about how you can capture images for both to create a cohesive marketing campaign.
- How can you make this photo unique? Most importantly, envision ways to make your product stand out in your industry. This will take brainstorming and tapping into your artistic side. Don’t forget to have fun!
Where to shoot the product
When trying your hand at DIY Photography, the first choice you need to make is location. There are several directions you can go with this choice, including:
- Finding an authentic location. No matter how realistic an edited background looks, an authentic background looks better. Let’s say, for example, you are putting out a new aloe vera skincare line. Your marketing pictures will feel more real if you do your photoshoot on a beach, rather than if it happens in a studio with a beach backdrop. And the more real your pictures look, the more likely it is that potential customers will believe the rest of your marketing.
- Fake it till you make it. You can also consider DIY versions that replicate the real thing. For example, a sandbox at home or a local park is an excellent stand-in for the white sands of Cancun.
- Go for a simple backdrop. Another great way to create professional-grade pictures without the fuss is to choose a simple background. In current visual trends, less is more. So, go ahead — find a nice, clean wall and shoot away.
The best lighting for the product
Lighting is an important factor when trying to get the best shot. When taking photos of your product, consider these tips:
- Avoid harsh lighting. When shooting your products, the first rule is to avoid harsh sunlight or harsh artificial lights. Overly bright light will create overexposure and cast aggressive shadows. While this may work well for artistic shots, it will likely blur or blow out the important details of your product. Instead, find the shade or a softer indoor light source.
- Find a window. A window is the ideal light source for your product photoshoot. A well-placed window lessens the harshness of direct sunlight while lighting up your subject.
- Avoid glare. After spending the time and effort to make your logo, don’t let a jarring glare obscure your label and other important details. Try different angles to minimize a pesky glare.
- Use artificial light. Indoor lighting can be tricky, but the right photo makes it worth the effort! Try different light sources until you find the one that best suits your product or subjects.
- Don’t be afraid to experiment. Bring an open mind to the photoshoot. It can take time to find the right lighting. If things aren’t going your way, play with the light you have to create something unique!
The most flattering angles for product pictures
There is no hard-and-fast rule for picking an angle for your product picture, but there are a few tips that may help you choose the perfect position:
- Use the rule of thirds. The rule of thirds is a photography concept that is simple to use. Imagine your frame is broken into thirds. To make an image more interesting, play with the way the subject takes up space — say, by inhabiting the bottom-right third instead of the center.
- Try an eye-level angle. Playing with angles in your photography can produce wildly different results. Using an eye-level angle is straightforward and clean.
- Worm’s eye view. This unique angle, where you place the camera below the subject, can create a playful or powerful image, depending on lighting or intent.
- Bird’s eye view. A bird’s eye view can create a sweeping look and is popular for beauty and wellness products. It creates an eye-catching way to look at your latest collection!
Not all subjects are the same. Consider what you are shooting and keep an open mind. What works with models may not work with products and vice versa. Take shots from multiple angles to make sure you walk away from your photoshoot with a shot you’re happy with.
How to edit lifestyle product photos
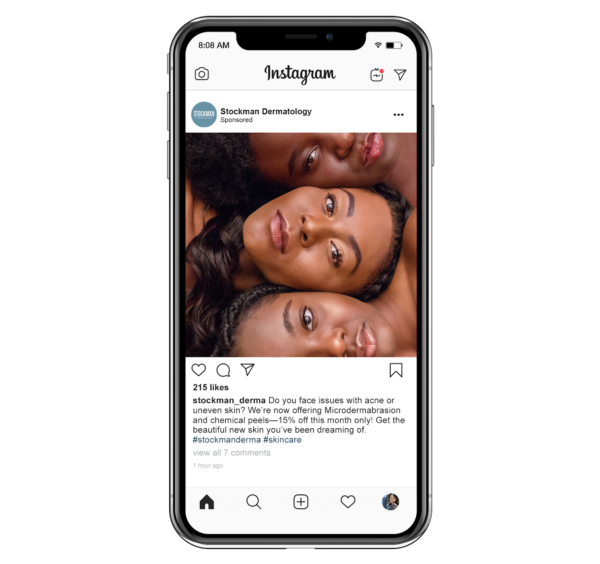
Once you’ve taken your gorgeous product photos, it’s time to edit. Editing is a great way to shape your images to fit the aesthetic of your mobile-responsive website, email campaigns, and social media marketing strategies. Getting familiar with a few basic Photoshop skills will help you edit standout lifestyle product photos.
Additional tips include:
- Check for sharpness. Make sure your subject contrasts with your background for easy editing later.
- Color correct. Even if you’re new to Photoshop, there are easy-to-use color correction tools that will help you look like a pro!
- Optimize exposure and contrast. Exposure and contrast are powerful elements in your photo. Unless you’re looking to create a specific effect, the goal should be to create a well-lit image.
- Retouch images. Retouch images on Photoshop only when needed. Major brands are eliminating the retouching tool from their toolbox, as consumers grow to value real images.
- Create the perfect background. Changing the background color of your photo can be transformative to your marketing images. Create the perfect aesthetic in post-production by playing with hues and patterns.
As with location, lighting, and angles, editing your image is all about play! Experiment with different tools to create a look you love for your wellness product.
Takeaways
Now that you know more about how to take lifestyle photos, edit them, and use them along with your resources for health and wellness branding, are you ready to get started? If you’re interested in reading more about how your photos can play an important part in your overall marketing strategies, check out The Download — a free guide for health professionals.


