If this article were written 30 years ago, we’d probably be telling you that if your business isn’t listed in the yellow pages, it might as well not exist. Today, your potential customers aren’t flipping through the phone book — they’re searching online and turning to Facebook.
If your customers are on Facebook but your business isn’t, you’re missing out. But learning how to create a Facebook business page is simple. Read on for a step-by-step guide to getting started, building your page, connecting with your current (and future!) customers, and making the most of your business’s page on Facebook.
Setting up your new Facebook business page
Before you can start building your Facebook business page, you must have a personal Facebook account. If you don’t have one, it’s a quick and simple process to set one up. All you need is a valid email address, and there’s no need to worry about fleshing that page out just now. If you already have one, simply sign in.
Now that you’re logged in, we can dive right into how to create a Facebook business page.
Step 1: Create a new page
After you’re logged in to your personal account, you can follow one of three possible routes to create a business page:
- The left-hand side of your Facebook dashboard contains an orange flag symbol with Pages. Click “Pages” then select “create new page.”
- In the upper right corner to the right of your small profile picture icon, “select the circle” with the three-by-three tic-tac-toe symbol. Look for the fourth option down, a flag symbol and the word “Page.” Select it.
- Follow this direct link.
On the left side of your screen, you’ll see a section titled “Create a page.” Under this section, you’ll see three fields to enter your company information: page name, category, and description.
Page name
This should be the name of your business. Many also choose to include their location after the company name. You can set location elsewhere later, but if you have a common name and want to reach local audiences, it could be helpful to go with something like “Tony’s Pizza Clarksville” instead of only “Tony’s Pizza.”
Category
When you start to type a category your business falls under, related options you can select from will appear. You can choose up to three categories for your business. In our example, Tony from Clarksville might go with “Pizza Place,” “Restaurant,” and “Food Delivery Service.”
Description
Add a brief description of your business here for the “about” section. The maximum character count is 255, so stick with something short and sweet. You can add more detailed additional information later.
Tony’s Pizza could use a description like: “We’re a small family-run pizza shop that’s been serving the Clarksville area for over two decades! We’re known for our homemade dough, sauce, and the freshest locally sourced toppings. Stop in for a family meal, takeout, or delivery!”
Desktop and mobile preview
The middle of the screen offers a section titled “Desktop Preview,” intended to show you what visitors to your page will see. This will update as you fill in your company information on the left. You can even toggle it back and forth to preview a mock-up that shows how your page will look on mobile devices.
Click to create
The last part of this first step is to click the “create” button in the bottom left corner.
Congratulations! You just created the bones of your Facebook business page. But we’ve still got some work to do before it’s complete.
Step 2: Add graphics and photos
You’ll need to add two key photos to your Facebook business page: a profile photo and a cover photo. These will remain on your page as part of its design — although you can certainly change them later. They’re part of your main page view, though, and different from the photos you’ll add to posts or albums later on.
Profile photo
The profile photo is where you’d put a photo of yourself on your personal page, to help your friends recognize you. On your business page, it’s traditionally where your logo goes. Depending on your business, your headshot may also be appropriate for the company profile picture. This could work if you’re the main service provider and the community already associates your face with your brand.
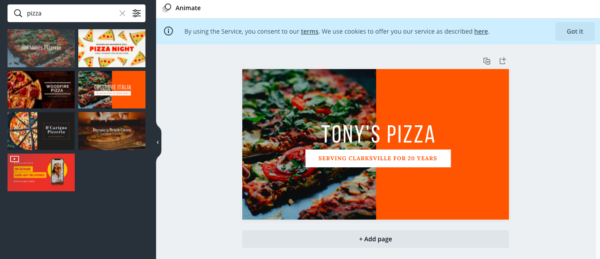
If you don’t have a company logo, no worries! You can use our own Logo Maker to create a logo for free. If you end up loving it, you’ve got yourself a logo. If not, you can still use it as a placeholder while you finalize the rest of your brand design, since Facebook will let you change this photo later.
If you’re starting from scratch, you want to make your Facebook photos the right sizes. Start by creating a design with custom dimensions. For Facebook profile photos, a good size is 180 pixels x 180 pixels. Sites like Canva typically offer a robust library of logo templates for your use. Stick to your brand colors! If you don’t have brand colors, now is a good time to establish them.
If you have an existing logo image file that needs to be resized to fit the page, free tools can help with that as well. Create a custom image sized 180 x 180 pixels, upload your logo file directly to the platform, and add your image to the blank square space. Adjust and zoom as needed to center the logo the way you want it.

Cover photo
Your cover photo spans the top of your business page. It’s prime real estate for highlighting any key messaging or star images. A free design tool can be helpful for creating your Facebook cover photo as well. Facebook recommends 1640 pixels x 856 pixels, but you won’t have to create a custom size if you preselect “Facebook cover” from the set design options.

Step 3: Add more details to page info
If you felt like you had more to say when you were finishing up the basics of creating your page, now’s your chance. You’ll create your username, add your contact info, craft a longer description, and more.
Username
You’ll see an area to create your username. You will need to come back to this and create your username once you have at least 25 page likes. Your username should be the same as your page name, if you can manage it. It will determine your unique page URL, which is the direct link that leads straight to your page. The format will be facebook.com/username, so Tony from Clarksville would try for facebook.com/TonysPizzaClarksville. You’ll notice you can’t add punctuation, but most people will understand “Tonys” means “Tony’s” here.
Business phone number
Include the phone number you want customers to use in order to reach you to ask questions, schedule appointments, make reservations, place orders, or more.
This shouldn’t be your personal phone number, unless you want the whole internet to have it. If you have a phone in your storefront or at a reception desk, that works great. If the majority of customer queries are really things that should come to your back office, list that number instead. Whatever phone number you list should be one someone will answer.
The email address you list here will be visible to the public, so you likely want to use a general inbox rather than one person’s email address.
Be sure to select an address that points to an inbox you plan to monitor so you can send timely replies as needed. Being easy to reach and responsive to customer communications strengthens your brand identity as reliable and helps cultivate a sense of trustworthiness.
Website
You may think it’s a no-brainer, but we have to say it. This is where you link your company website. It’s best practice to send visitors to your main page, but sometimes a specific landing page could also work, particularly if you’re running a promotion or want to highlight a new product or service.
If the majority of your customer contacts seem to be looking for similar information, you might use the website field to link them directly to a page that answers that question and spares them a few clicks or a phone call.
Business address
Here, instead of listing your mailing address, if you have a physical location, list that instead: the place you want your customers to actually go. If your business doesn’t have a physical location that’s open to the public — say you’re a graphic designer who works from home and meets clients for meetings at the local coffee shop — select the option “my page doesn’t have a location.“
You then have the opportunity to enter optional additional location details. While these are optional, we recommend including as much info as possible for the best customer experience. Simply select yes or no for the following three questions:
- Does your page have a physical location customers can visit?
- Does your page travel to its customers?
- Can customers buy your goods or services online?
Service areas
Facebook allows you to select up to 10 service areas for your business. These should be areas you serve or deliver to. Include as many as 10 if they apply, so that your page will have a better chance of coming up on local searches.
If your business serves more than 10 areas — say you’re a jewelry designer who ships to all 50 states and nearly anywhere else — you’ll have to pick just 10. Try to be strategic, if you can, and select the areas your customers most commonly come from. You can clarify your full service area elsewhere, if you want.
Business hours
Your business hours are essential to include. You will see four options to select from, including “no hours available” and “permanently closed.” Since you’re building a new page, presumably for a business that’s still, well, in business, you can ignore those.
You will want to choose between the two other options: “always open” or “open during specified hours.” If your physical location keeps specific hours, this section should reflect those. Even if Tony is happy to answer pizzeria emails at midnight, if his pizzeria closes at 10:00 pm, customers might be confused and disappointed if he lists “always open.”
Temporary services changes
During the early days of the COVID-19 challenges, where many businesses closed temporarily or changed their hours, Facebook adapted its business page capabilities. Businesses can now easily keep customers informed of service changes.
Select one or any combination of the following: online services, delivery, pick-up, and other. If you partner with a delivery service like Instacart, DoorDash, or UberEats, paste the links in this “other” area. They’ll show up on your page in green to alert customers of different delivery options.
Another section also makes any temporary service changes clear. Select either “temporarily closed” or “operating as usual.”
Here’s a pro tip: If you’re switching up hours for any reason, make it a priority to update the hours on your Facebook business page. Nothing’s worse for a customer than arriving in your parking lot expecting you to be open because your Facebook page says you are only to find all the lights off and the doors locked. Taking care to provide accurate and updated information serves customers and fosters positive relationships with your brand.
Additional COVID-related options/updates
This field allows you to provide any additional announcements or updates pertaining to COVID-19. This element shows up as a banner at the top of your business page.
It may simply be a statement on your company’s response or including an explanation of safety precautions you’re taking to help set customers’ minds at ease. Some businesses have chosen to include an encouraging message of support and solidarity with their local communities.
Privacy policy
If you have a privacy policy, include it on your page. Even if it’s not something you expect people to look for often, the more information you can provide about your company, the better.
Additional info
This field will appear under the “about” section you wrote when you first set up your page — the one that had a 255-character limit. This “additional info” section gives you a lot more room to work with, with a maximum of up to 10,000 characters.
It’s not required, so don’t feel pressured to add something here. But if you want to clarify any of the earlier info or simply expand on some background information about your business, like your company history or your brand’s mission statement, you can provide more info or specialized content if needed.
Price range
Show your price range with options of different amounts of dollar signs. Select the one that reflects your prices, and a symbol such as $$$ will show up in the “about” section.
Be as accurate as you can here. While some customers find certain price ranges off-putting — whether they’re too low or too high — customers do appreciate transparency and honesty.
Social accounts
Here you should provide direct links to your other business social media accounts. Those can include Instagram, Twitter, or LinkedIn, if you have them. It never hurts to give interested people more ways to keep up with your business.
Page buttons
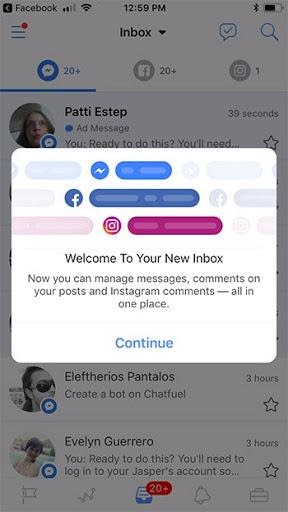
The default button on your business page is Send Message. You’ll see it to the right of your profile picture and company name. This button directs messages to your Facebook page’s inbox.
It’s worth mentioning again that you should give people contact options you intend to keep up with and reply to. It can be difficult to monitor and respond to messages 24/7, so you might want to change this call to action button to something more manageable and more effective. Go to “+add a button,” and select from multiple options. A popular choice is “call now,” where you’d simply enter the business line you want customers to call.

How much does a Facebook business page cost?
You may have noticed that you haven’t been prompted to provide any credit card info or a payment method. Creating your Facebook business page is free. Managing the page, posting, and looking at insights have always been free.
The only costs for using Facebook to market your business are if you choose to purchase paid ads. Using Facebook ads for your local business can be an effective strategy to boost visibility and target specific users who might be interested in your offerings. You can budget for it as part of your online marketing efforts, but even the free page should help drive visibility for your brand, without you needing to spend a dime.
Tools to help manage your page efficiently
You’ve seen how simple setting up your page can be. Managing the page is only as complicated as you want to make it. Facebook offers a number of built-in tools to take your page to the next level. At the end of the day, though, an effective page’s two main goals should be regularly posting engaging content and interacting with customers — replying to comments, answering questions, and more.
Facebook Business Suite
When you create your business page, you have access to Facebook Business Suite. This can be a helpful resource when you have questions or could use some support. We recommend checking out the Facebook Blueprint section of Business Suite. It has free online self-guided courses you can take your time reviewing.
Advertising
As the owner of your business, your time is money. Maximize your business’s budget efficiently with an online marketing service partner. Easily find customers on Facebook and Instagram, drive website traffic, and grow your contact list. The Business Suite also includes options for paid advertising directly through Facebook.
Assign management roles
Since you’re in the process of getting your business page up and running, it’s OK to take your time getting familiar. Once you’re comfortable, you can assign page management roles to other people on your team. The roles you have control over are admin, editor, moderator, advertiser, and analyst.
You will be in the admin role with full management access. You can assign a colleague to also be an admin, or make them a page editor or moderator. You don’t have to fill all roles, but it’s definitely a good idea to train at least one additional team member who knows the ins and outs of your business’s Facebook page.
Insights and analytics
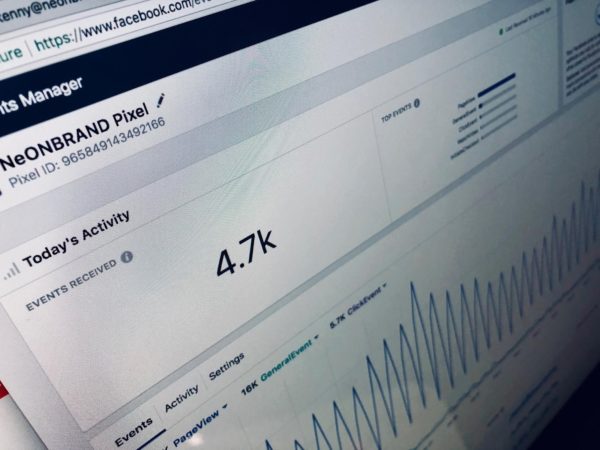
Management roles on your page have access to page analytics through Facebook Insights. Track key performance indicators (KPIs) including:
- Clicks, comments, and shares
- Impressions and engagement rates
- Total reach
- Organic results vs. paid results
- Statistics on “negative” actions like hiding posts, spam reports, and people unliking your page
Use these KPIs to inform your content strategy. Take notice of posts that perform well to see what you can learn from them. Look at everything from word count to the kind of photos used to the type of content in general. Sometimes the highest-performing posts promote fun interactions and have nothing to do with your company or product.

Just because you start something a certain way doesn’t mean you have to stick with it. Insights can also help you determine the best times to post. Your content itself could be extremely effective but just needs to be posted at a more opportune time for your audience. Tweak things along the way to drive engagement, brand awareness, and sales conversions.
Customer reviews
Facebook reviews can have a powerful impact on your business, especially for the restaurant industry. Keep an eye on all reviews and make an effort to respond to each one, both positive and negative. Thank people for positive reviews, and be gracious to those who’ve had negative experiences. Consider apologizing or reaching out personally with an offer to make things right.
Create and connect
With this guide on how to create a Facebook business page, you’ll feel prepared to start using Facebook to grow your brand and make it easier for your customers to find you.
Creating a Facebook business page can help you tell your story and explain your business’s mission. Take the first steps to get set up, and with a little careful planning, you can try out different types of content to see how your fans react.
Measure your social media performance and pay attention to what’s working, and what’s not, and learn from the people who are already engaging with your page. Before you know it, you’ll be creating and sharing engaging content that’s relevant to the people you’re trying to reach.


